
Reloading has been a slow burn for me. I started when I was really young, probably 12 or 13, when my dad let me begin loading shotgun shells in our garage. From there I progressed to loading a few metallic cartridges with him using the old Lee Loaders, mostly for casual plinking and a bit of prairie dog hunting. It wasn’t until my early 20s, when a good friend helped me get started loading rifle cartridges, that reloading really took hold.
Back then, I learned reloading pretty much the same way most of us did. Someone showed me how to do it, I read the instructions that came with the equipment, and I followed the accepted process. It worked, so I didn’t have much reason to question any of it. I wasn’t really thinking about what each individual step was accomplishing or whether every one of them was actually necessary. I was just learning how to produce safe, accurate ammunition.
I’ve spent years adding steps, testing ideas, buying equipment, abandoning things that didn’t work, and finding faster ways to accomplish things that did. What I’ve learned is that precision rifle reloading isn’t about doing everything someone tells you might matter. It’s understanding what each operation is supposed to accomplish, measuring whether it actually accomplishes it, and deciding whether the result is worth the time.
Like most other people, I started with a pretty rigid regimen of steps. I didn’t really understand many of them either, and honestly, I still don’t. I mean, why the heck do you need to clean the soot and carbon out of a primer pocket, and how would that aid in accuracy?
I usually ran the brass through a tumbler and then resized it. Back then, I was using the messy RCBS Case Lube 2 and a case lube pad. It worked, but it really sucked getting all that lube off the cases when I was done. I wish I’d had the bright idea I use now of tumbling the brass after sizing, so it cleaned the cases AND removed the messy lube!
Then I would dutifully clean out the primer pockets and chamfer the case mouths. I’d trim when I had to, but it usually took 2-3 firings before that was necessary. Then I’d add primers. I used the press at first and eventually moved to a hand priming tool. Finally, I would add powder and seat a bullet. Honestly, that’s pretty dang close to the same basic process I use today.
You know, that old process worked for me, and it worked for years and years. I was already working in the shooting industry, and I probably shot more rounds per year than most people, but I still didn’t shoot a ton, so I never really needed to progress as a reloader. That didn’t change until I was in my 40s, when I discovered how much I enjoyed buying a rifle and trying to develop a load that would really make it sing. That’s when reloading started taking a different direction.
One of the first people I really started to pay attention to was John Barsness. His writing always kind of resonated with me. He didn’t have the normal industry glitz, and he was always pretty neutral about actual products, so he never felt like he was trying to sell me something. As I started playing with these used rifles and trying to make them really shine, Barsness’s writing kind of guided me to that next level. What it probably did more than anything, though, was make me start questioning and testing what was really happening.
Chasing Concentricity in Reloaded Ammunition
Up until this point, I had never really thought about things like concentricity. When I finally read about runout, it made so much sense to my analytical brain. If your ammo isn’t straight, how the heck is it going to shoot little tiny groups? Man, that became my first really deep, dark rabbit hole. In fact, it might really be the backbone of everything I’ve learned, because it was the first place I really dug down into the system.
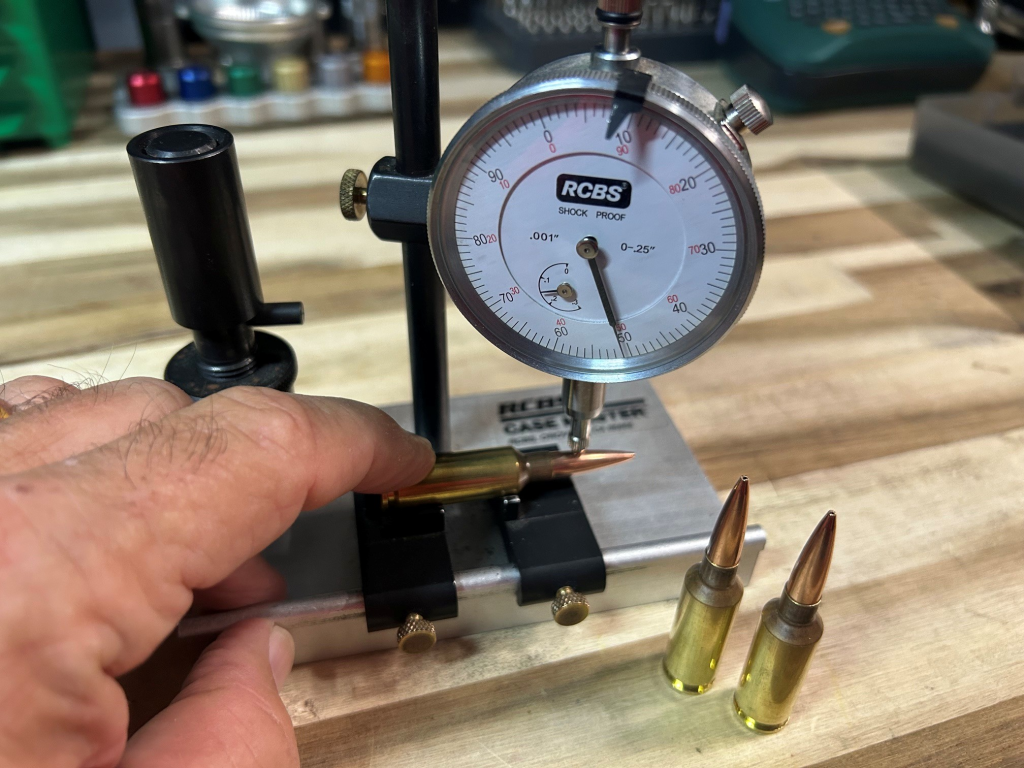
Based on what I’d read about the importance of concentricity, I bought my first concentricity gauge. I still have that gauge sitting on my reloading bench and use it often, although its function has changed quite a bit today. I started measuring the runout on the ammo I was producing, and what I found made me question everything.
Until then, I had pretty much used traditional two-die sets. They’d always produced ammo that was perfectly acceptable.
I’m going to take an aside here because I think it’s important to this whole conversation. Back then, rifles and ammo weren’t nearly as accurate as they are today. Right now, we live in the golden age of shooting. You can walk into a local gun shop, buy a rifle, scope and a box of ammo, put them together, and head to the range with a reasonable expectation of a sub-MOA system. Twenty-five years ago, that simply wasn’t the case. If I could get one of my rifles to shoot sub-MOA, that was really something. We’re spoiled now!
So with that in mind, if I was seeing something around an inch to an inch and a half out of my rifles for three shots, I wasn’t unhappy. Today, I wouldn’t accept that.
When I started measuring the ammo I had been producing, though, the runout wasn’t very good. My ammo had a lot of it, so I started digging into why and how I could fix it.
I had read that traditional dies can induce runout when you drag an expander ball back through the neck after sizing the case down. A traditional die can size the neck down considerably farther than necessary. I didn’t realize this back then, but it became clear as I began measuring my brass with my new concentricity gauge. When you squeeze the neck way tighter than it needs to be, then pull an expander ball back through that really tight neck, you create a wonderful environment for runout to take hold.
Runout can really be induced in this scenario by two different mechanisms. First, brass is pretty ductile—a fancy word meaning it can deform without breaking—and the neck walls aren’t always perfectly consistent in thickness all the way around. If one side of the neck is thicker than the other, the expander doesn’t encounter the same resistance all the way around as you pull it through. That uneven force can pull your nicely sized neck slightly out of alignment.
The second way runout can be induced happens as you pull the case back out of the die. The case rim is now caught on the underside of the shell holder while the expander is being pulled through the neck. There’s some clearance between the case and shell holder, so the case can tilt slightly as the expander comes through. That gives the expander another opportunity to pull the neck out of alignment.
I figured all this out by reading a lot and then measuring with my new shiny tool. The very first thing I did was remove the expander ball. Want to guess what I found? If I didn’t have an expander in my system, the necks were almost always perfectly concentric. If they weren’t, there was a deeper die issue I needed to look at.
I tried loading some brass without an expander, but the necks were way too tight. It was hard to seat a bullet, and even with a perfectly concentric neck, all that extra seating force could create its own runout problems. So I had to expand the necks.
I’d also read that pushing an expander through the neck gave the case much more support, especially if you repositioned the expander as high as you could in the die so the die supported the case more completely and kept it centered. The case head was also being pushed against the flat inner surface of the shell holder instead of hanging from the rim as the expander was pulled through. This helped reduce runout quite a bit. It wasn’t always perfect, but it was the first step in figuring out how to drastically reduce the runout I was seeing.
I still wasn’t happy, though. I read about guys producing ammo with zero runout. As much as I know now, I highly doubt they were reporting real numbers, but it gave me something to shoot for. One cure I had read about was neck sizing only, especially using a Lee Collet Die. I ordered one to try, and quite honestly, this was a bit of an epiphany.
When I first got the collet die, I found almost instantly that I was getting zero runout on the cases themselves. That absolutely blew my mind after all the futzing around I’d done trying to mitigate it by removing and repositioning expander balls. I’d even ordered a bunch of decapping/expander ball rods in each caliber to try to find some that had zero runout in the assembly itself, hoping that might reduce my concentricity woes. Then I buy a fairly inexpensive die that only neck sizes, but does it with a mandrel and a collet, and instantly I had perfect necks. Made me perk up and take notice!
I should add here that I had also added another step to my brass prep, although I only did it once for each batch of brass. After the brass had been resized the first time, I measured the neck wall thickness variation and culled anything with more than .0015” of variation. That way, if I was having a runout issue, I knew it wasn’t being caused by significantly uneven neck walls.
Where Does Bullet Runout Come From?
This is where it gets pretty interesting. If you have perfectly sized cases with zero runout at the case mouth, where does the runout come from in loaded ammo? Everyone kept telling me runout came from the brass itself, but if the brass is perfect, why do I still get runout? That became the next rabbit hole I tried to figure out.
As you can guess, I had started with traditional seating dies. They worked okay, and sometimes I got stellar results, but there would always be a few rounds with excessive runout. At the time, I kept hearing people rave about the Redding Competition Seating Die as one of the better seating dies for producing concentric ammo, so I ordered one to see if it would help.
It did. Instead of the case and bullet being relatively unsupported as the bullet starts into the case mouth, the Redding Competition Seating Die uses a close-fitting sliding sleeve that supports and aligns the bullet and seating stem while the die body fully supports the case during the seating process. That makes it much harder for the case or bullet to get off-center as the bullet starts into the neck. I was getting consistently more concentric loaded rounds with this die, but I still had some stinkers mixed in!
I tried some of the weirdness I’d read about, where you seat a bullet partway, rotate it 180 degrees in the die, and then finish seating it. That didn’t change anything at all. I also tried bringing the die down over the bullet a couple of times without engaging the seating stem, thinking that little sleeve might help pre-align the bullet with the case mouth. That didn’t produce any meaningful change either.
It finally occurred to me that I might be inducing some of the occasional runout by not having the bullet sitting perfectly straight on the case mouth before I seated it. When I started making sure the bullet was prealigned with the case neck before seating, I saw another reduction in runout, but it still wasn’t gone. I had finally gotten it down to where I was generally under .004”, with a decent number of rounds around .001-.002”.
Refining the Reloading Process
That became my process for quite a while, but of course I encountered another problem. While I was creating straight and accurate ammo, the cases themselves would sometimes start fitting too tightly in the chamber. I was only getting a couple of firings before the bolt took a bit more force to close than I liked, so I knew I needed to resize the whole case. I had read about using Redding Body Dies to resize the case body and push the shoulder back without touching the neck, so I ordered one. It fixed the hard-chambering issue, but of course now I had added another step, even if I only needed to do it every third firing or so.
I should probably mention that around this same time I started chasing powder measurement too. I had read about some new fancy scales that were able to measure powder charges down to essentially the individual kernel. That was pretty intriguing, but the cost was absolutely astronomical. I had also read about guys using older RCBS scales, especially the 10-10 balance beam, to really tighten up their charge weights. So I went down that rabbit hole. I used a Chargemaster to throw the initial charge, usually setting it a couple tenths light, then transferred it to a 10-10 scale and used a trickler to get it just right. I was pretty anal about all this, and all that work seemed to be paying off at the range. My ammo was becoming much more accurate.
Here’s the rub, though. I’d been changing a lot of things over these few years, but I hadn’t isolated any single step and compared the loaded ammo or accuracy I achieved to what I had produced before. Yes, my ammo was definitely better, but I can’t look you in the eye and honestly tell you which changes were responsible, or how much each one contributed. Hell, some of it could have simply been that I was being much more careful with every step and more deliberate about consistency. I wish I could tell you exactly what it was, but I had added a lot of details, and they were clearly paying off.
When Precision Rifle Reloading Became High Volume
In 2025, I shot my first PRS match. It was something I had wanted to do for a very long time. Heck, I’d been talking about trying it for close to a decade, but there were never any matches close to me in Oregon. Once I moved to Texas, I started finding out there were quite a few matches within an hour or two of home. I talked Mike Martin into attending one with me, and it kinda drove the next series of rabbit holes.
To say PRS bit me would be an understatement. It’s one of those sports that seems tailor-made for a geek like me. I loved the analytical and technical aspects of it, while at the same time being able to continually improve my long-range shooting skills. I dove in headfirst.
As I made that dive, it became apparent pretty quickly that my loading techniques weren’t going to keep up. At first, I was only shooting a match a month or so, but that quickly became two matches a month, and then three, while my ammo needs continued to climb. I was also loading all of Mike’s ammo, so my volume started increasing exponentially.
I learned almost immediately that the body-die portion of my process had to be done every single time. Trying to shoot a stage while fighting your rifle’s bolt to close on a round is not a very fun thing to have happen, so that became part of my routine. Size the necks with the collet die, then run the cases through the body die to resize the body and set the shoulders back. Now my ammo chambered easily every time.
Next, the hard eyeball landed on my powder-measuring process. This was the real slowdown in my system. It just took a long time to trickle up several hundred rounds at a sitting. I kept hearing all the guys at the matches talking about their fancy AutoTricklers, and honestly, I fought it longer than I probably should have. By the end of 2025, though, I knew I couldn’t sustain my current system any longer, so I just ordered the damn thing.
It was a pretty amazing change. This new powder measure was one of the most liberating products I had ever used. It was faster than my Chargemaster, and being able to measure down to essentially the individual kernel was awesome. I really don’t think the base accuracy of my ammo changed at this point with the new AutoTrickler, but it sure sped up my process.
Making the Reloading Process More Efficient
Right about the same time, I’d also had a stomach full of my two-step process for sizing brass. That just wasn’t going to keep working for me. I had briefly tried bushing dies when I was chasing runout, but I didn’t really understand how to use them correctly. I had induced some runout with a Redding Competition S Bushing Die and came away thinking it wasn’t a useful system. In hindsight, the problem was totally me. I didn’t know how to order the right bushings or use the die correctly. I still can’t tell you exactly what I did wrong, but when I approached the system again a little more analytically, I found I could produce cases almost as concentric with a bushing die as I could with my Lee Collet Dies.
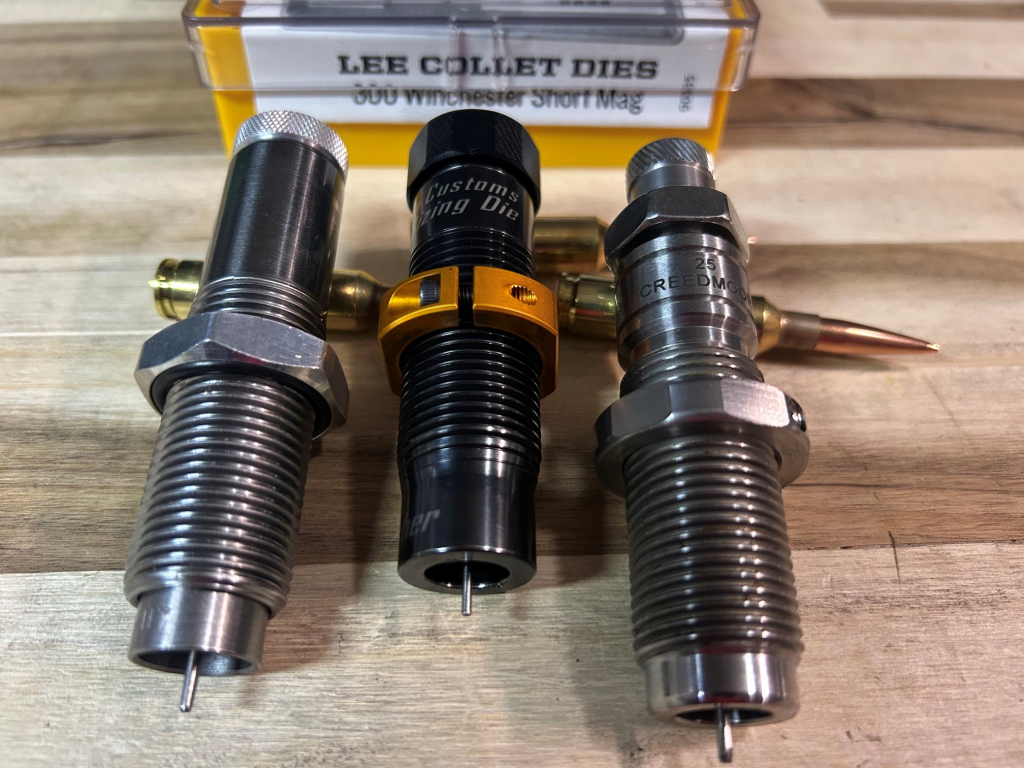
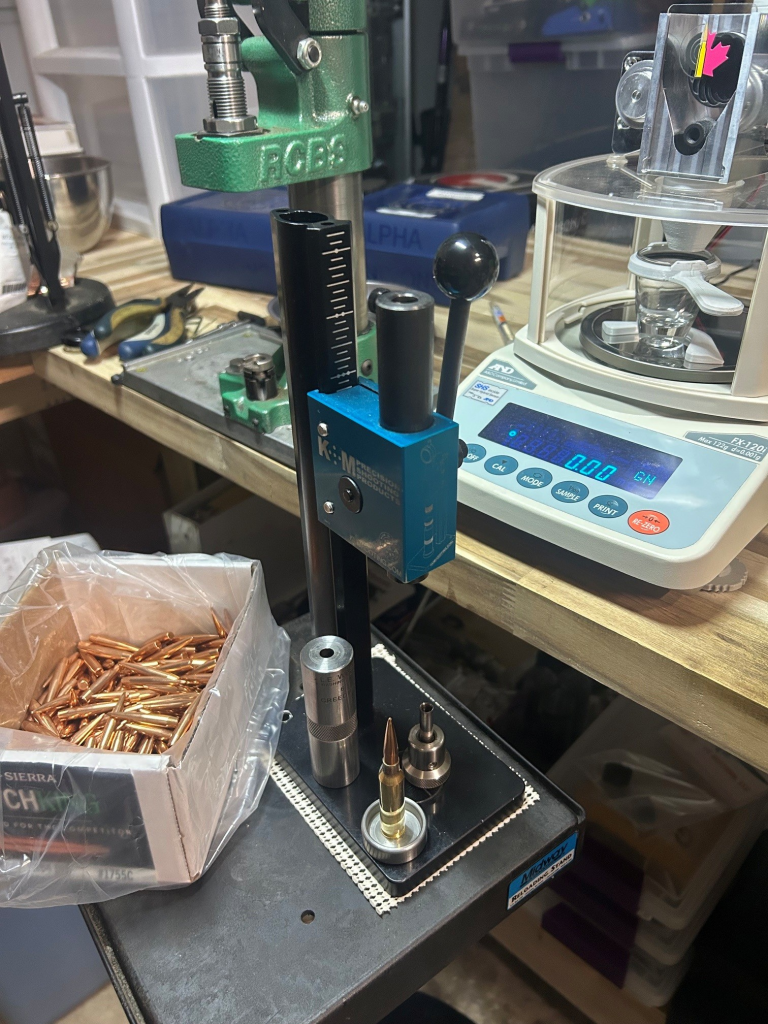
Concurrently, I had also decided I really didn’t like seating bullets with the big press. I’d always read about using inline dies to seat, but I’d been resistant to buying another press. Well, I finally bit the bullet and ordered a K&M Arbor Press along with some L.E. Wilson inline seating dies. I also noticed Wilson offered sizing dies, so I ordered a couple of those as well. By now, I knew enough to order the right size bushings, or at least get close enough to get me started.
If it seems like I was in a whirlwind of change, you’re getting the right idea. I was changing as fast as I could. I was doing anything and everything I could to streamline and speed up my process while still producing great ammo.
You know, I thought the inline dies were going to change my world when it came to concentricity. I guess I naively thought I was going to produce ammo with 100% zero runout. Instead, my runout stayed almost exactly where it already was. I mean, these dies are fantastic, and I don’t want to take anything away from Wilson. I don’t use anything but their seaters anymore, so that should tell you something, but I can’t look you in the eye and tell you they dramatically changed my results. Now, if I hadn’t already worked so hard at finding where runout was being created in my system, they might have made a more dramatic difference.
What they did do was give me more speed. I had found that operating the big press while I was trying to use the AutoTrickler was creating issues with the scale. The scale needs to be on a super quiet bench with no airflow or vibration, and working the press on that same bench made the scale go wonky.
I don’t think I ever described this, but back when I was a young man and didn’t have a very big house or much room, I had bought a little reloading stand from Frankford Arsenal and attached a press to it so I could load ammo in my space-confined home. The press was long gone, and I realized the little stand was the perfect place for the K&M press. I put the press and a box of bullets on that tiny bench top, right next to my V4 AutoTrickler, and suddenly I could seat bullets almost as fast as the powder measure spit out a charge. This little system got me moving pretty dang fast.
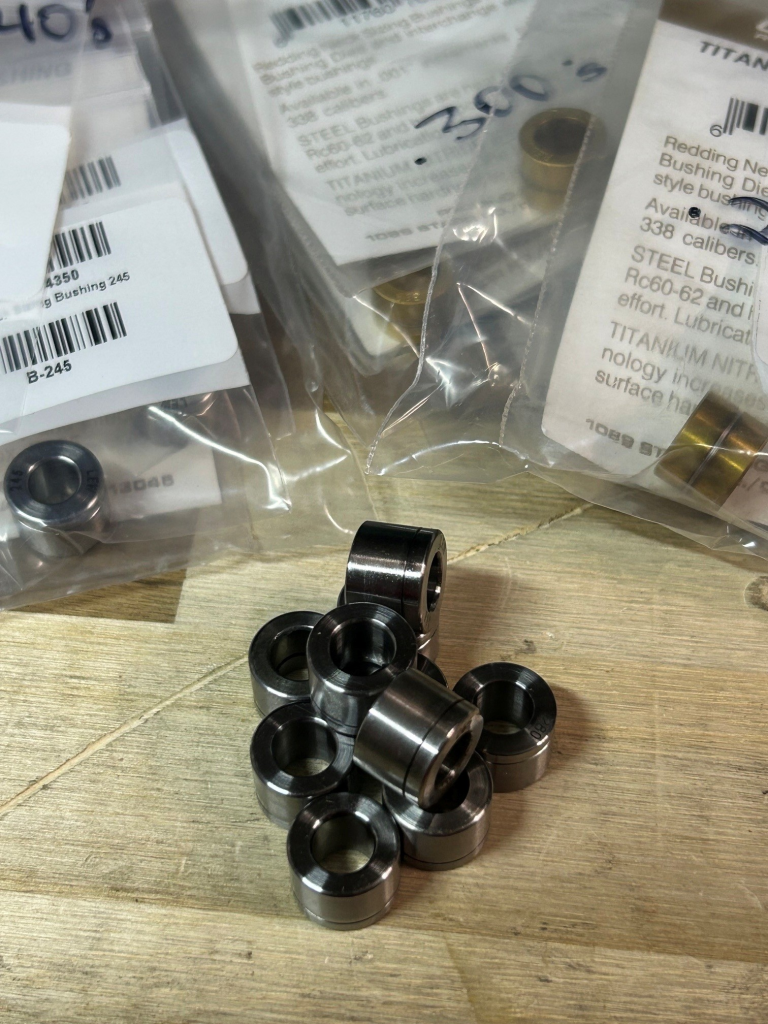
I had also started using the Wilson sizing dies, and with a lot of use, I was becoming pretty adept at ordering the right bushings to get my neck tension where I wanted it the first time. I should warn you, though, it takes more bushings than I would have originally thought. Maybe you can do it better than me, but I’ve still ended up with a whole pile of bushings! The nice thing is they allow you to really tailor your neck tension to exactly where you’d like it to be.
I’ve found that I really like to sit somewhere between .0015” and .002” of neck tension. I should mention here that we use the term “neck tension” to describe how tightly the bullet fits in the case neck, but what we’re really talking about is an interference fit. I’m just pointing out the technical distinction. We all use the term neck tension, and we all understand what we’re talking about.
I should probably back up a bit here. So much was changing so quickly that it’s hard to get all of this in the right order. Honestly, it was a pretty chaotic period of change.
I already had some Redding bushing dies, but they were all neck-sizing dies. That was one of the reasons I started trying the L.E. Wilson sizing dies. I needed a full-length sizing die, and I was already placing an order for seaters, so I just added a couple of sizing dies to the order. Almost instantly, I found I could size my brass in one step, get almost perfectly concentric cases, and set the correct neck tension all at once. Holy cow man, two steps down to one, AND my runout was virtually identical. It felt like everything was coming together.
Well, as you can imagine, I also had one more piece of the puzzle that needed to change. I was still annealing every fourth firing with a candle. Can you imagine sitting there with a candle, several hundred cases, and a wet towel? Hell, I was doing it myself, and I still can’t imagine it! So I bit the bullet again and went straight to an AMP annealing machine.
Now, there’s a lot of talk out there about making everything exactly the same every time, and that annealing is part of that process. I don’t want to take anything away from that thought because it makes sense to my analytical brain, but at the same time, I didn’t see any magic change in consistency when I started annealing with every firing. If I’m being honest, though, that’s not why I added the annealer. The biggest reason for me was preserving my expensive brass. That had always been the reason I annealed, and it continues to be the reason I use that process. I’ve seen unannealed brass start developing neck splits somewhere around 7-10 firings, while I’ve taken annealed brass to 20 firings. Brass is the most expensive component in my reloading, so my gosh, if I can keep it going that much longer, I’m going to do it.
So at this point, you can see the overall steps haven’t really changed in my system. What has changed is the level of refinement to create speed and efficiency. I still really enjoy loading. Most of the time. But when I have to load 300 rounds in a day so I can shoot a match that weekend, it loses some of its luster. Conversely, when I can sit down and lovingly pump out 50-100 rounds for a hunting rifle, it’s thoroughly enjoyable.
Reloading is a fantastic hobby, especially if you love digging into the analytical side and enjoy solving problems. I’ve been chasing those problems for years, as you can see, and it’s pretty gratifying to be on the backside of some of them and see the fruits of all that testing. It’s still ongoing, too. I still test little changes, and there are no sacred cows. If you can show me something meaningful that improves my system, I’m 100% all ears!